Begin ElasticSearch With Chinese
0x01 序
项目开发中需要使用es来进行一个文档类网站的全文检索实现,记录环境搭建过程。并给出简单demo,实现中文关键字的全文检索。
0x02 安装
本文使用的环境说明及依赖
- OS:
CentOS release 6.8orWindows 10 - node:
v6.9.4(CentOS release 6.8)orv6.2.0(Windows 10)(可选) - git:
1.7.1(CentOS release 6.8)or2.7.0 (Windows 10) - jre: 1.8
- es: 5.0 rtf版
安装步骤
elasticsearch-rtf 安装
"什么是Elasticsearch-RTF? RTF是Ready To Fly的缩写,在航模里面,表示无需自己组装零件即可直接上手即飞的航空模型,Elasticsearch-RTF是针对中文的一个发行版,即使用最新稳定的elasticsearch版本,并且帮你下载测试好对应的插件,如中文分词插件等,目的是让你可以下载下来就可以直接的使用(虽然es已经很简单了,但是很多新手还是需要去花时间去找配置,中间的过程其实很痛苦),当然等你对这些都熟悉了之后,你完全可以自己去diy了,跟linux的众多发行版是一个意思。" – https://github.com/medcl/elasticsearch-rtf
- 下载版本包
git clone git://github.com/medcl/elasticsearch-rtf.git -b master –depth 1
经过漫长的等待,完成下载
cd elasticsearch-rtf
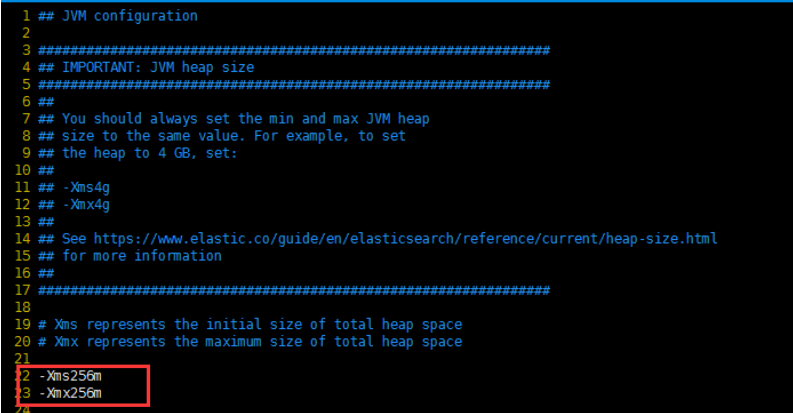
- 修改配置文件
- vi conf/jvm.options中的-Xms与-Xmx(默认是2G)
- 修改conf/jvm.options及bin/elasticsearch文件的编码为UTF8(vim中使用
:set ff?查看文件格式,如果出现fileforma=dos则说明文件编码格式不对,可以使用:set fileformat=unix来修改文件的编码为正确格式) - 启动 注意: 使用非root账号来启动
./bin/elasticsearch
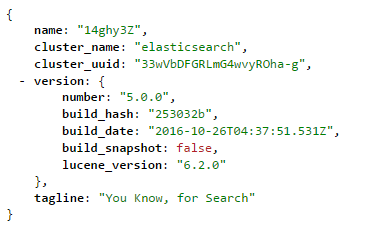
访问http://localhost:9200,看到如下信息,表明安装成功
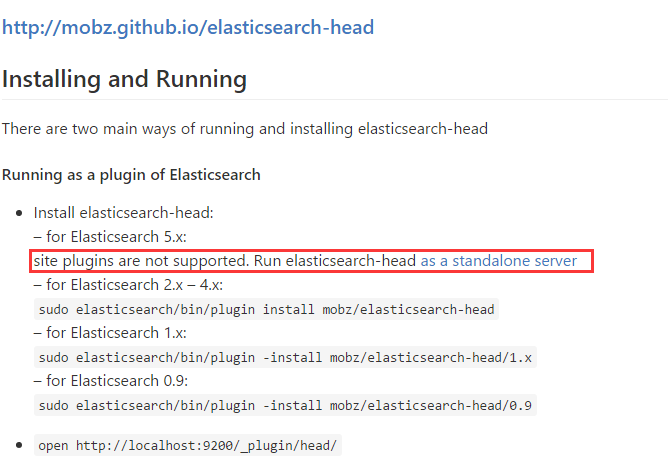
elasticsearch-head 安装
由于head插件在ES5.x版本中不再支持安装在plugin目录中,所以需要独立安装, 有node独立运行以及使用nginx两种方式来安装head插件。
使用node独立运行
- 安装cnpm
- 安装过程中依赖nodejs的npm包管理工具, 鉴于国内槽糕的网络环境,需要使用淘宝的cnpm来代替npm的功能,安装方法如下:
- 安装nodejs (版本要求参考环境依赖)
- 安装cnmp
npm install -g cnpm –registry=https://registry.npm.taobao.org
安装完之后使用下面的命令查看cnpm版本号应该>=4.4.2
cnpm -v
- 下载es-rtf
git clone git://github.com/mobz/elasticsearch-head.git
- cd elasticsearch-head
- cnpm install
- 安装grunt-cli
cnpm install -g grunt-cli
- grunt server
- open http://localhost:9100/
使用nginx
elasticsearch-head本身是个静态站点,可直接使用nginx当做服务器来使用。
- cd /usr/local
git clone git://github.com/mobz/elasticsearch-head.git
然后在nginx中添加
location /head {
   alias /usr/local/elasticsearch-head;
}
open http://nginx-server/head
elasticsearch-bigdesk 安装
原项目作者未升级bigdesk插件用来支持5.x版本,所以使用国内一作者fork的版本来进行安装
- cd /usr/local
git clone https://github.com/hlstudio/bigdesk.git
然后在nginx中添加
location /bigdesk {
    alias /usr/local/bigdesk-master/_site;
}
open http://nginx-server/bigdesk
nginx
使用nginx将elasticsearch、elasticsearch-head、elasticsearch-bigdesk整合在一起。
- 添加下面的nginx配置后重启nginx
 server {

        listen       80;
        server_name  localhost;

        location / {
           proxy_pass http://127.0.0.1:9200;
        }

        location /bigdesk {
           alias /usr/local/bigdesk-master/_site;
        }

        location /head {
           alias /usr/local/elasticsearch-head;
        }

}
- es http://localhost
- head http://localhost/head
- bigdesl http://localhost/bigdesk
0x03 使用
建立索引并添加数据
注意之前测试windows cygw下的curl有中文编码问题,命令建议从head插件页面上进行执行
curl -XPOST 'localhost:9200/index/doc?pretty' -d '
{
    "url":"http://www.xxx.com/",
    "title":"基本概念",
    "content":"一些文件内内容的基本概念介绍"
}'
查询
curl -XPOST 'localhost:9200/index/doc' -d '
{
  "query": {
    "multi_match": {
      "query": "概念",
      "fields": [
        "title",
        "content"
      ]
    }
  },
  "from": 0,
  "size": 5,
  "highlight": {
    "fields": {
      "title": {},
      "content": {}
    }
  }
}'
es集群安装参考ElasticSearch Cluster